Have you ever felt like your Singer sewing machine was not delivering its full potential? Well, the secret to unlocking new sewing possibilities lies in the right presser foot. These seaming accessories help grand the professional result out of your sewing, be it a zipper, buttonhole, or decorative stitch. In this guide, we will take you step-by-step on how to attach various presser feet, the instances to use them, and how they can take any sewing project from good to gorgeous!
What Are Presser Feet?
Presser feet are attachment pieces that hold the fabric during the sewing process. Various presser feet make it easier to handle certain functions, including hemming, quilting, and inserting zippers.
Depending on the task at hand, the presser feet are specially designed for such things as hem something, quilt, or insert zips.
The proper sewing machine attachments are supposed to help maintain smooth feeding, even between stitches, and some neat finish to the work.
How to Attach a Presser Foot on a Sewing Machine
- Turn Off the Machine – Always switch off your Singer sewing machine before changing presser feet for safety.
- Raise the Presser Foot Lever – This lifts the presser foot, making it easy to remove or attach a new one.
- Release the Current Foot – If your machine has a snap-on system, press the small lever at the back of the presser foot holder. For screw-on feet, use a screwdriver to loosen the foot.
- Attach the New Foot – Align the new presser foot under the presser foot holder. Lower the presser foot lever, and it will click into place for snap-on feet. If using a screw-on foot, tighten it securely.
- Lower the Presser Foot – Make sure it’s properly attached before starting to sew.
Essential Presser Feet & How to Use Them
1. Zipper Foot
Best for: Sewing zippers, piping, and cording.
- Attach the zipper foot to sew close to the teeth of the zipper.
- Adjust the foot position depending on whether you are sewing the left or right side of the zipper.
- Keep your stitches straight for a clean, professional finish.
How to Attach a Zipper Foot to a Singer Sewing Machine:
- Remove the standard presser foot.
- Snap or screw on the zipper foot to the presser foot holder.
- Adjust the needle position to sew close to the zipper teeth.
- Lower the presser foot and start sewing!
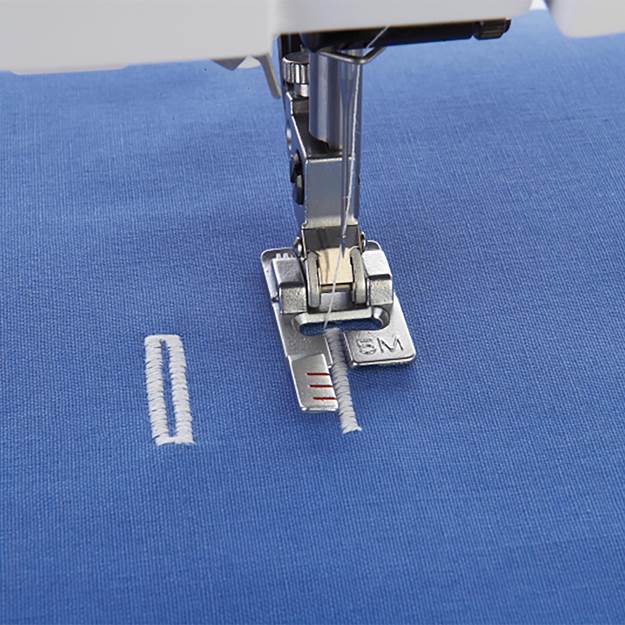
2. Buttonhole Foot
Best for: Creating precise, even buttonholes.
- Place the button in the buttonhole foot’s adjustable slot.
- Select the buttonhole stitch on your Singer sewing machine.
- The machine will automatically sew a perfectly sized buttonhole!
3. Walking Foot
Best for: Quilting and sewing multiple fabric layers.
- Helps feed thick fabrics evenly without shifting.
- Ideal for sewing denim, leather, and stretch fabrics.
4. Rolled Hem Foot
Best for: Creating delicate, professional hems.
- Guides the fabric to roll and stitch at the same time.
- Perfect for lightweight fabrics like chiffon and silk.
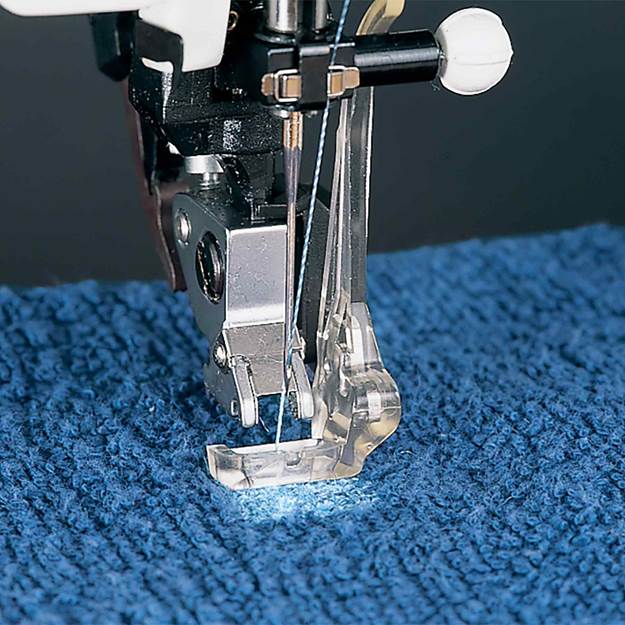
5. Overlock Foot
Best for: Finishing fabric edges to prevent fraying.
- Mimics a serger stitch for a clean, professional look.
- Ideal for sewing garments and home décor.
Sewing Tips for Using Presser Feet Effectively
✔ Selection– Use the suitable foot depending on whether you sew a zigzag stitch, buttonhole stitch, or a straight stitch.
✔ Testing – Before sewing your final piece, test all your stitches on a scrap piece.
✔ Adjustment – Lighter fabrics require less pressure, while thicker fabrics need more.
✔ Cleaning – Wipe with a pinecone from time to time to remove any lint, threads, and dust.
Conclusion
Master different presser feet and say hello to endless possibilities for your sewing projects. From installing zippers with precision to creating professional buttonholes, the right sewing machine attachments can make all the difference.
So, start discovering the magic of presser feet with your Singer sewing machine!